Normally on a Sunday I find myself feeling restless yet equally with not enough energy to actually do something. That is, until recently where the thought of watching yet another football maybe became too much for even me to bear. So in a bid to escape I put on my coat, picked up my new camera and put my I-pod to play and headed out for a walk around a lake nearby. New to the photography scene I started snapping away and became lost in a world of thought. As the sun was setting I contemplated all things worldly and suddenly I was struck with wonder as to how on earth a tree is actually transformed into your worktop or piece of furniture. Never one to shy away from learning new things I headed into work on Monday wanting to know everything I could and this is what I learnt…

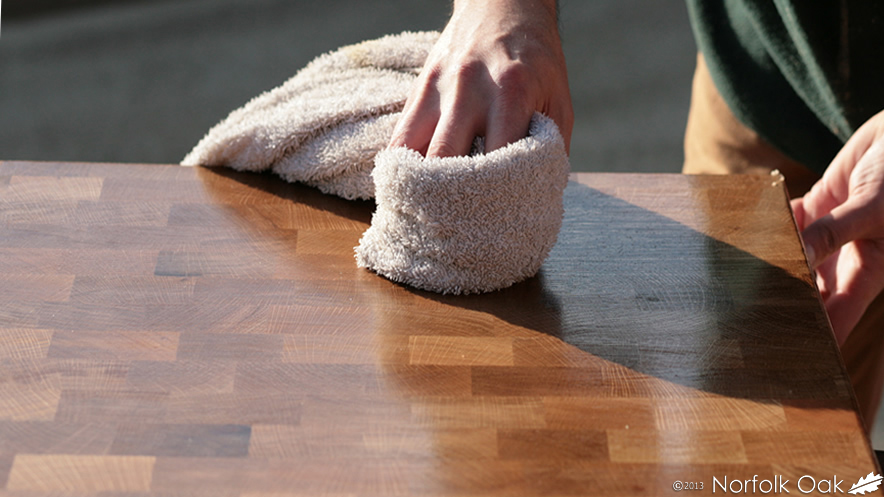
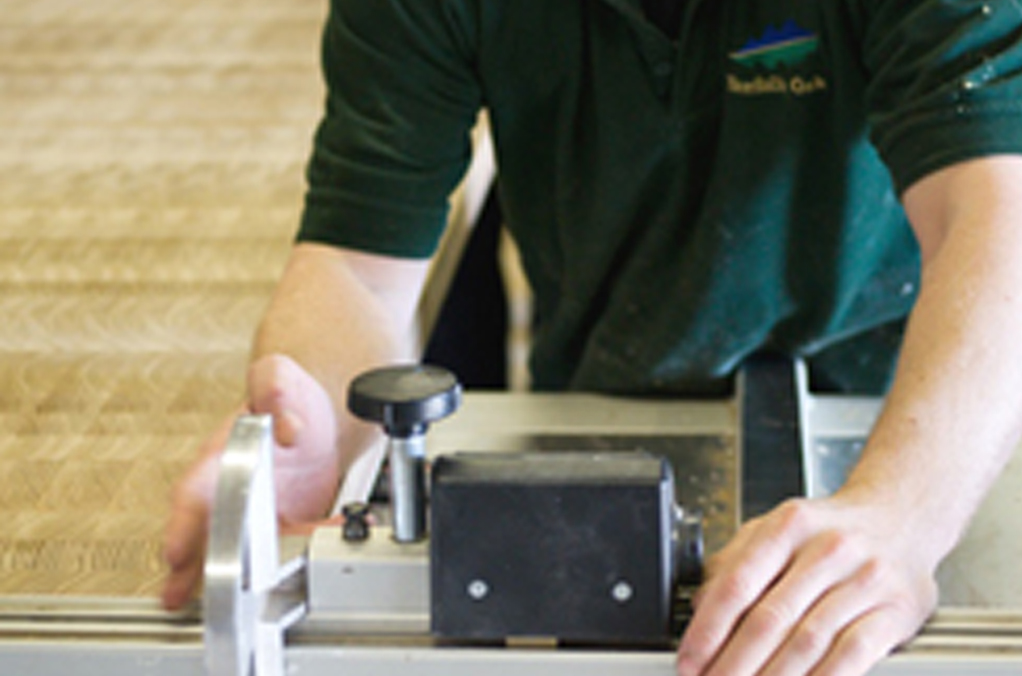
Making the perfect wooden worktop is an extremely complex task and something that is very difficult to achieve. The timber needs to be hand selected to allow for any defects to be removed. It requires the finest timber to be kiln dried slowly reducing the moisture content to less than 10%. If rushed, the timber can split. Once the timber has been initially graded, the lumber goes into the rough mill. The planks then pass through a laser sizer which measures the planks for lengths and widths while automatically telling a computer where to cut that particular plank to optimise the yield. Once completed, the planks then go through a ‘dynamic’ rip saw and come out in one of three standard widths. These are then sent through a ‘wood eye’ which scans and cuts out any defects. The different lengths are then sorted and stacked according to length and width. At this point, the lumber is ready to go in to the finger jointing machine if making block style worktops or directly to the moulder if it is for planked worktops. The finger jointing machine cuts ‘fingers’ at each end making the join incredibly strong when glued. It is at this point that it can be decided how long this particular run of wooden worktops should be, automatically selecting the required number of staves to make that length before being glued and compressed to make one long stave. A 4 sided planing machine is used to clean up and square the staves leaving good edges so that the staves can be glued together. The correct number of Staves are then selected to make the width of the worktop required and colour matched before the worktop is then finally glued up and pressed to ensure a solid bond. The worktop is then machined in such a way that suits the design needs – All our worktops are bespoke depending on the clients requirements so Drainage grooves, end caps, cut-out etc are added. When constructed it is then saturated with oil in the hot dip tank not only enhancing the colour of the worktop but protecting it for years to come. Finally, the worktop will be finished by hand in order to check that every detail is perfect.
For once, I was pleased that the football was on TV as it meant that I got out and about and was able to learn new things. Although it is nice to switch off your mind by sitting down and relaxing I have since found myself wanting to get out and explore new things more often. One small walk around a lake has enabled myself to become a little wiser and that can never be a bad thing…
Curiosity is what gains you knowledge,
what will you learn next?